You can send an email to individual contacts in HubSpot from the contact record or from the associated company, deal, ticket, or custom object record. You can also reply to emails sent to a personal email or to a team email address connected to the conversations inbox from the record timeline.
Please note: a connected inbox is required to send emails through the CRM. Learn how to connect your inbox.
Send one-to-one emails
- Navigate to your records:
- Contacts: In your HubSpot account, navigate to CRM > Contacts.
- Companies: In your HubSpot account, navigate to CRM > Companies.
- Deals: In your HubSpot account, navigate to CRM > Deals.
- Tickets: In your HubSpot account, navigate to CRM > Tickets.
- Custom objects: In your HubSpot account, navigate to Contacts > [Custom object]. If your account has more than one custom object, hover over Custom Objects, then select the custom object you want to view.
- Click the name of a record.
- In the left panel, click the email Email icon.
- In the pop-up box, write your email. If the data privacy settings are turned on and the contact's legal basis to communicate has not been validated, you must validate it before sending the email.
- To send the email to a specific email address, in the To field, click the name dropdown menu then select another email address associated with the contact.
- To send the email from another connected personal email address or a team email address, in the From field, click your email address then select another connected email address to send from. The name in the From field is the user name set in your Profile & Preferences settings.
Please note:
- When sending one-to-one emails from custom object records, the To field will not automatically populate with any associated records. Learn more about logging activities to custom objects.
- The From name feature is not supported for Office 365 connected inboxes.
-
- To edit the associations, click the Associated with dropdown menu in the bottom right, then select the checkbox next to the records you want the email engagement to log to. The email activity will log to the contact, company, deal, or ticket records selected from this dropdown menu.
-
- Enter a subject for your email.
- Type the body of your message. In the top toolbar:
- Click Templates to insert an email template.
- Click Sequences to enroll the contact in a sequence.
- Click Documents to insert a sales document.
- Click Meetings to insert a scheduling link or proposed meeting times.
- Click Quotes to share pricing information.
- To modify the text, use the formatting options at the bottom of the editing window.
- To edit the font style and size or the text alignment, click the More dropdown menu.
- To add hyperlinked text, click the link link icon.
- To add an image, click the insertImage image icon.
- To attach a file, click the attach paper clip icon .
- To insert snippets, add links to your knowledge base (Service Hub only), insert a video, or edit your signature, click the Insert dropdown menu.

- Click Send.
Reply to one-to-one emails
You can reply to one-to-one emails sent to a personal email, or emails that were sent to a team email address as part of a thread in the conversations inbox.
- Navigate to your records:
- Contacts: In your HubSpot account, navigate to CRM > Contacts.
- Companies: In your HubSpot account, navigate to CRM > Companies.
- Deals: In your HubSpot account, navigate to CRM > Deals.
- Tickets: In your HubSpot account, navigate to CRM > Tickets.
- Custom objects: In your HubSpot account, navigate to Contacts > [Custom object]. If your account has more than one custom object, hover over Custom Objects, then select the custom object you want to view.
- Click the name of a record.
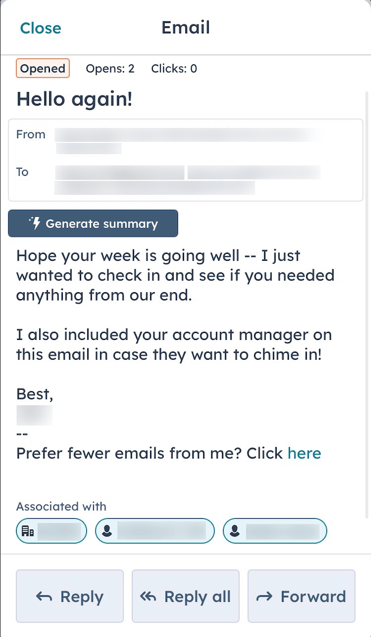
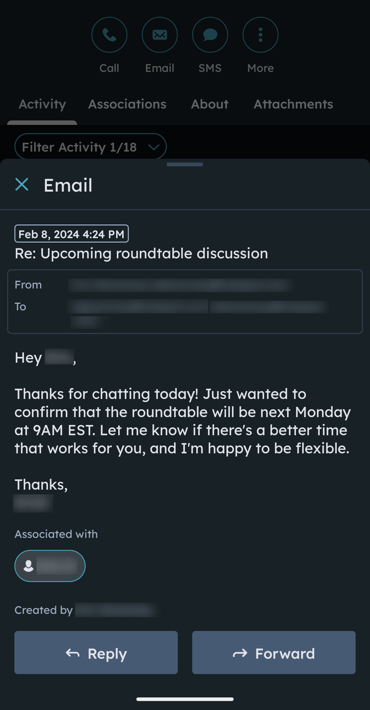
- Locate the email on the record timeline and click Reply. If the thread includes another member of your team, click Reply all to reply to both.
Please note: if the email is from your team member to the contact, clicking Reply will send the email only to your team member, and not the contact.

- To send the email to a specific email address, in the To field, click the name, then select another email address.
- To send the email from another connected personal email address or a team email address, in the From field, click your email address then select another connected email address to send from. The name in the From field is the user name set in your Profile & Preferences settings.
- To edit the associations, click the Associated with dropdown menu in the bottom right, then select the checkbox next to the records you want the email engagement to log to. The email activity will log to the contact, company, deal, or ticket records selected from this dropdown menu.
Please note: if you're replying to an email that is part of a thread in the conversations inbox, and are using a team email address to reply, if you select a ticket from the Associated with dropdown menu the email activity will log to the ticket record and appear as part of the thread in the inbox. Therefore, all previous emails on the thread will also be associated with the ticket record.

- Compose and format your reply, then click Send.
Forward one-to-one emails
If you need to send a contact's reply to another member of your team or someone outside of your organization, you can forward the email from the CRM.
- Navigate to your records:
- Contacts: In your HubSpot account, navigate to CRM > Contacts.
- Companies: In your HubSpot account, navigate to CRM > Companies.
- Deals: In your HubSpot account, navigate to CRM > Deals.
- Tickets: In your HubSpot account, navigate to CRM > Tickets.
- Custom objects: In your HubSpot account, navigate to Contacts > [Custom object]. If your account has more than one custom object, hover over Custom Objects, then select the custom object you want to view.
- Click the name of a record.
- Locate the email on the record timeline and click Forward.

- In the To field, enter the recipient's email address.
- Click Forward.
The forwarded email will appear on the contact's timeline, with 'Fwd' preceding the subject line.

Send and reply to one-to-one emails in the HubSpot mobile app
To send a new email to a contact in the HubSpot mobile app:
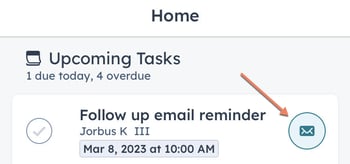
- Open the HubSpot app on your device.
- If any tasks in the Upcoming Tasks list on the HubSpot app home page are email tasks associated with a contact with an email address, you can tap the email icon email to compose an email to the associated contact.
- To send a new email to a specific contact:
- Tap Menu, then tap Contacts in the left sidebar.
- Tap the name of a contact to open their record.
- Below the contact's photo, tap the email email icon.
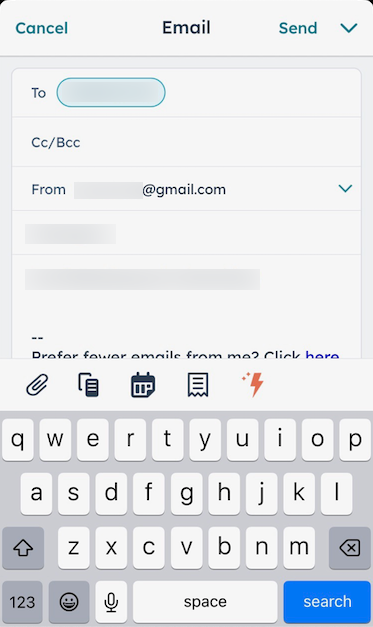
- In the email composition window, enter a subject line for your email and enter any additional contacts in the CC/BCC field.
- You can enter an email message from scratch, or you can use a sales email template from your account. To use a template, click Use template at the top then select a template from the list.
- You can include additional content from your device or HubSpot account at the bottom of your screen:
- To attach files, documents, images, or other content from your device, tap the attach attachment icon, then select the content from your device's gallery.
- Tap the salesTemplates templates icon to use one of your sales templates.
- To add a meeting link to the email, tap the meetings meeting link icon then select a meeting link from the list.
-
-
- Tap the textSnippet snippets icon to include a snippet in your email.
-
-
-
- Tap the dynamicFilter lightning icon to use AI assistant to help you generate content for your email.
-
-
- When you're ready to send your email, determine whether to send your email immediately or schedule it for a later date and time:
- To send the email immediately, tap Send in the top right.
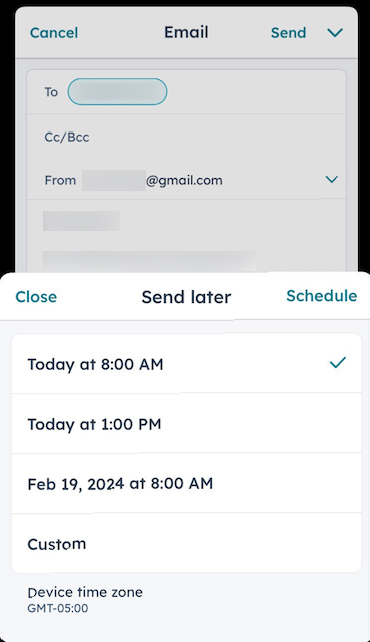
- To schedule your email, tap the down down icon next to Send in the top right, then tap one of the options. Several common sending times are available as default options or you can tap Custom to manually specify the date and time your email will be sent.
- When you're ready to send your email, determine whether to send your email immediately or schedule it for a later date and time:
You can also reply, reply-all, or forward to an email directly from a record timeline:
- Tap Menu, then tap the record type in the left sidebar (e.g., Contacts, Deals, Companies, or Tickets).
- Tap the record name.
- Locate the email on the timeline, then reply directly or review the email first:
- To reply directly to the email, tap the three vertical dots verticalMenu in the top right of the email card, then tap Reply or Reply all.

-
- If you want to review the original email first before composing your reply or forwarding it, tap the email. Then, at the bottom of the screen, tap Reply, Reply all, or Forward.